If you're interested in a easier way to make a pattern online (you'll have to get a screen capture program to save it), go to The Create Page of www.animal-crossing.com. Other Pattern Making programs can be found at Animal Crossing Community and Anicro Desapro: Animal Crossing Design Aid Program. Remember, there is no way to directly transfer a pattern from your PC to your GameCube/Game Boy Advance, or vice versa. Youll have to do it by hand, block by block. Sorry.
To start off, youll want to find a picture of the character you want as a pattern, in bitmap (.bmp) or .gif form, since .jpeg formats usually dont retain enough detail for this project. You could use them as a reference, however, to make a pattern from scratch. NES sprites work best, followed by SNES and GBA, due to the lack of color options. Sprites can be no larger than 32 by 32 pixels, since the Pattern program has only 256 blocks available. Sprite sheets should work out well, as long as theyre in .bmp form or you can convert them to something you can manipulate in an image manipulation program picture (I use MS Paint, therefore this tutorial will focus on what to do using this program. Yes, it is mediocre.) Remember that often the edges of the pattern are cut off when displayed on clothing, and posting a pattern on your front door will cut out a lot, since the space to put it in is round. The picture you find may be too large at first, so I would manually create a duplicate, creating a new and zooming in until creating it using the pencil brush is easy (the pencil brush draws one pixel at a time, you see.)
Here, we have a basic NES .gif image
If youve decided on an image thats not just the sprite, youll probably want to blank out the parts of the picture that isnt the character you want to make a pattern out of.

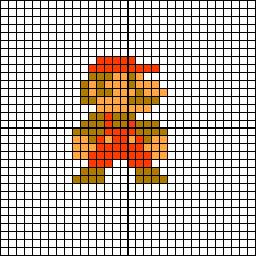
A 32x32 pixel image. Try to center it as much as possible, and you may want to save it for later.
Once youve got an image thats 32x32 pixels or less (if its less, youll probably want to leave a white border around it, just makes it easier later on.) youll want to blow it up. I find the most accurate way to do, the one that causes the least distortion, is a cut and paste routine. Using MS Paint, Go to Edit, Select All, then Copy. Then go to Image, Then Attributes. With the units selected as pixels (which I believe is the default), change the Width and Height to 256. Then select Edit, followed by Paste. Now it gets tricky. To get the image the right size, after selecting paste, you should have the ability to manipulate the size and location of the image with a little cross-shaped thingy that turns into four arrows when center around the image. Click on the bottom corner of the pasted image with that thingy, then drag it to the bottom corner, just to the edge, so that you can see a dotted line just on the edge of the paper.

Heres the result. If you didnt get it right, it can be repaired later.
Next, you save this blank grid, modified from stealthepbs grid, who placed it on the Animal Crossing board at http://cube.ign.com.
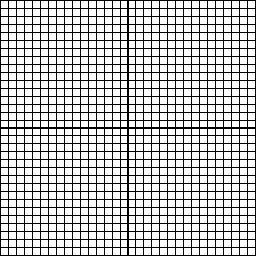
Open this in MS Paint, go to Edit, then Select All, then Edit/Copy. Then open up your image, again in Paint, and look at where all your paint brushes, erasers, spray paints and shape thingies are. Look below that, and there should be two blocks that look basically the same. This decides whether pasted images will paste whatever your secondary color is. Make sure the color you select with the right mouse button is white, and click the second/bottom button. Now, when you select Edit/Paste, your picture wont be replaced completely by the grid. Instead, youll have a grid around your picture!
If your image doesnt quite fit in the grid, use the pencil paintbrush to make repairs.
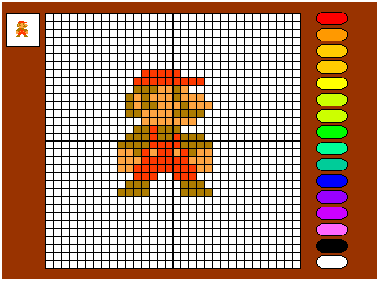
From here, you can paste the whole image to a large background that looks like one used in AC, like this one if you want, and paste the original, 32x32 image I told you to save in the smaller box.
In other words, transform this:
![]()
into this:
Back to main